

Crafting a chocolate bouquet is a delightful way to surprise someone special with a gift that’s as beautiful as it is delicious. Perfect for birthdays, anniversaries, or just because, a chocolate bouquet combines creativity and sweetness into a stunning edible arrangement. In this guide, you’ll learn how to make a chocolate bouquet that will leave everyone in awe, with step-by-step instructions, expert tips, and SEO-optimized content to help you create a showstopper.
Why Make a Chocolate Bouquet?
A chocolate bouquet is more than just a gift—it’s an experience. Unlike traditional flowers, this edible masterpiece combines the universal love for chocolate with the visual appeal of a floral arrangement. According to a 2023 survey by Statista, 60% of gift-givers prefer personalized, handmade presents, making a chocolate bouquet a perfect choice for standing out.
Whether you’re a DIY enthusiast or a beginner, this project is fun, affordable, and customizable. Plus, it’s a fantastic way to showcase your creativity while indulging in everyone’s favorite treat—chocolate!
Materials You’ll Need to Make a Chocolate Bouquet
Before diving into the process, gather these essentials to ensure a smooth crafting experience. Most items are budget-friendly and easy to find at craft stores or online.
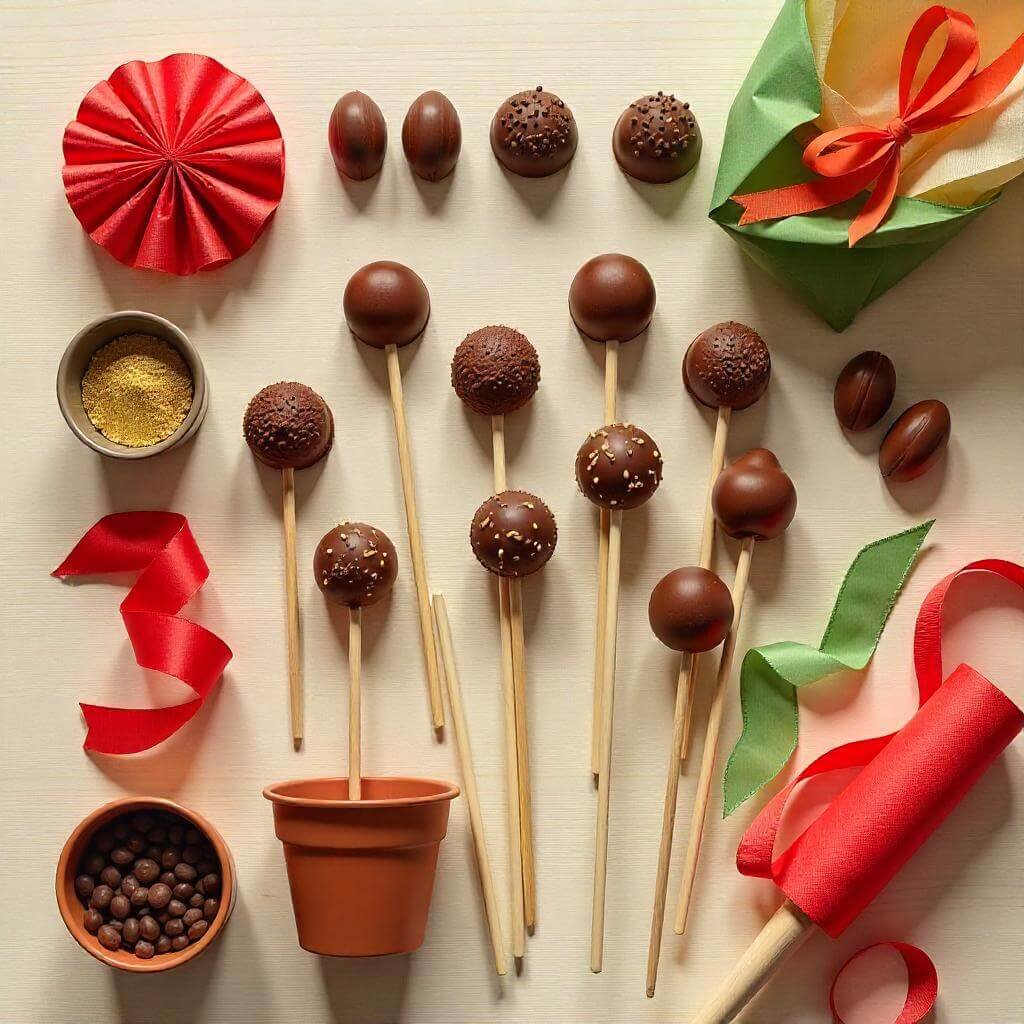
- Chocolates: Choose a variety of wrapped chocolates (e.g., Ferrero Rocher, Lindt truffles, or Hershey’s Kisses). Aim for 15-20 pieces for a medium-sized bouquet.
- Wooden Skewers: For securing chocolates and creating “stems.”
- Floral Foam or Styrofoam: To anchor the bouquet in a pot or basket.
- Tissue Paper or Cellophane: For wrapping chocolates to resemble flower petals.
- Ribbon and Decorative Wrap: To add flair and tie the bouquet together.
- Small Pot or Basket: As the base for your arrangement.
- Tape and Scissors: For securing materials.
- Optional: Artificial leaves, glitter, or small gift tags for extra charm.
Pro Tip: Shop at stores like Michaels or Amazon for affordable craft supplies.
Step-by-Step Guide to Make a Chocolate Bouquet
Follow these simple steps to create a chocolate bouquet that’s sure to impress. Each step is designed to be beginner-friendly while allowing room for creative flair.
Step 1: Prepare the Chocolates
To make your chocolate bouquet look like a floral arrangement, wrap each chocolate to resemble a flower bud.
- Attach a wooden skewer to the back of each chocolate using tape. Ensure the chocolate is secure but the wrapper remains intact.
- Wrap tissue paper or cellophane around the chocolate, twisting it at the base to create a petal-like effect.
- Secure the wrapping with a small piece of tape or a ribbon.
Tip: Use bright colors like red, pink, or gold for a vibrant look.
Step 2: Create the Bouquet Base
A sturdy base ensures your chocolate bouquet stays upright and looks professional.
- Place floral foam or Styrofoam inside your pot or basket.
- Cover the foam with decorative moss, tissue paper, or shredded paper for a polished appearance.
- Secure the foam to the container with tape if needed.
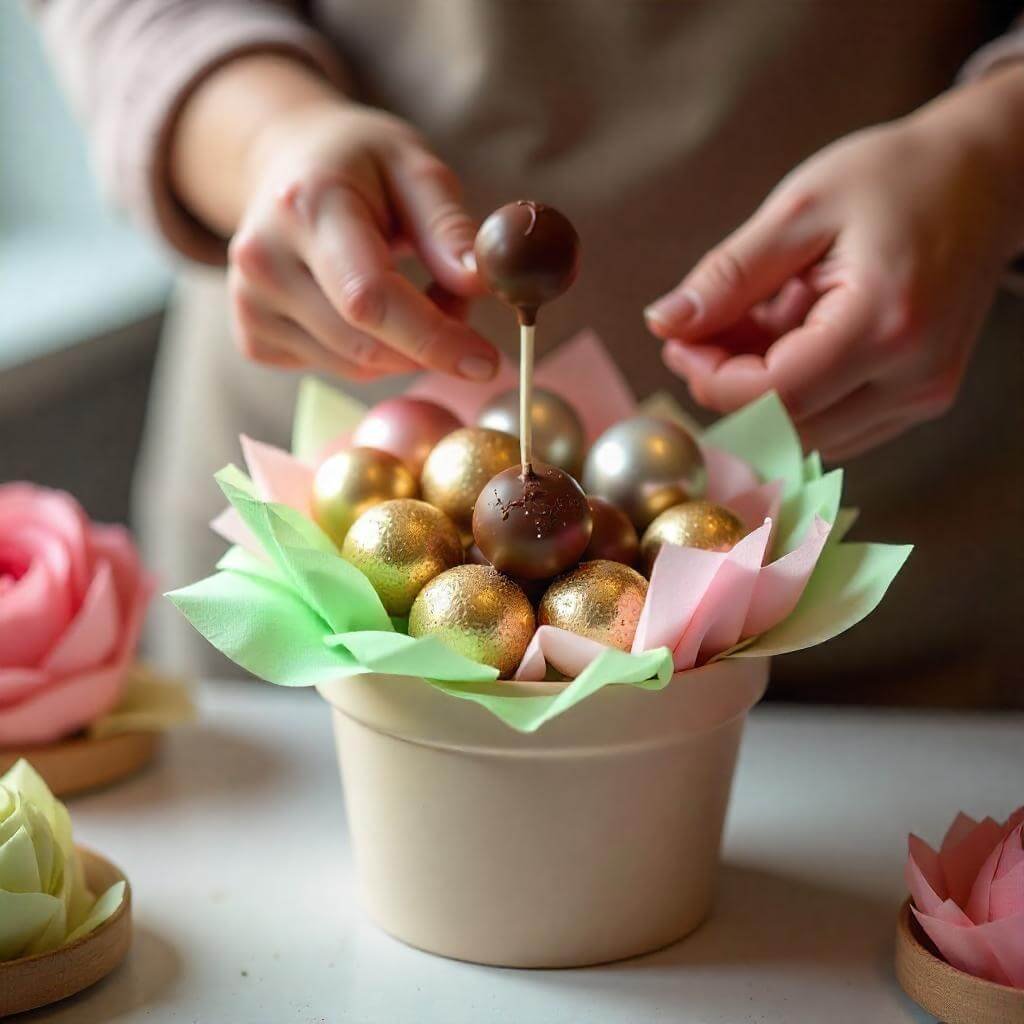
Step 3: Arrange the Chocolate “Flowers”
Now comes the fun part—arranging your chocolates to create a stunning bouquet.
- Insert the skewered chocolates into the foam, starting with the tallest pieces in the center.
- Add shorter skewers around the edges to create a rounded, bouquet-like shape.
- Space the chocolates evenly and vary colors for visual appeal.
- Add artificial leaves or small decorative elements between chocolates for a natural look.

Step 4: Add Finishing Touches
Elevate your chocolate bouquet with these final details.
- Wrap the entire bouquet in cellophane or decorative paper, tying it with a ribbon.
- Add a gift tag or a small card with a personalized message.
- Sprinkle glitter or attach small ornaments for extra sparkle.
Tip: Watch this YouTube tutorial by Crafty DIY for visual inspiration on wrapping techniques.
Tips to Make Your Chocolate Bouquet Stand Out
Want to take your chocolate bouquet to the next level? Try these expert tips:
- Mix Chocolate Types: Combine milk, dark, and white chocolates for variety.
- Personalize It: Include the recipient’s favorite chocolate brands or flavors.
- Seasonal Themes: Use holiday-themed wrapping (e.g., red and green for Christmas) to match the occasion.
- Add Edible Extras: Incorporate lollipops or cookies on skewers for a mixed edible bouquet.
- Practice Arrangement: Experiment with different layouts before securing the skewers.
Real-World Example: Sarah, a DIY blogger, shared on Pinterest how her heart-shaped chocolate bouquet for Valentine’s Day went viral, racking up 10,000 repins. Her secret? Using gold-wrapped Ferrero Rocher chocolates and a red ribbon for a luxurious look.
Common Mistakes to Avoid When Making a Chocolate Bouquet
Even seasoned crafters make mistakes. Here’s how to avoid common pitfalls:
- Overcrowding: Too many chocolates can make the bouquet look cluttered. Aim for balance.
- Weak Base: Ensure the foam is secure to prevent the bouquet from tipping over.
- Poor Wrapping: Practice wrapping chocolates neatly to avoid a messy appearance.
- Ignoring Color Coordination: Stick to a cohesive color scheme for a professional finish.
Why a Chocolate Bouquet Makes the Perfect Gift
A homemade chocolate bouquet is a thoughtful, versatile gift that suits any occasion. It’s budget-friendly (costing $15-$30 depending on materials), customizable, and guaranteed to make the recipient smile. Plus, it’s a sustainable alternative to cut flowers, as every part is edible or reusable.
For added inspiration, check out Etsy for creative chocolate bouquet designs or browse Good Housekeeping for more DIY gift ideas.
Conclusion: Wow Them with Your Chocolate Bouquets
Learning how to make a chocolate bouquet is a rewarding way to create a memorable gift that’s both beautiful and delicious. With just a few materials and a touch of creativity, you can craft an edible masterpiece that will leave everyone in awe. Follow the steps above, experiment with your own flair, and share your creations with us in the comments!
Ready to get started? Grab your chocolates and let’s make a chocolate bouquet that steals the show!